

Enable Notifications in a Web Browser
If you previously blocked Braver notifications in your browser, you need to open the site settings to turn this permission back on.
Google Chrome
Section titled “Google Chrome”-
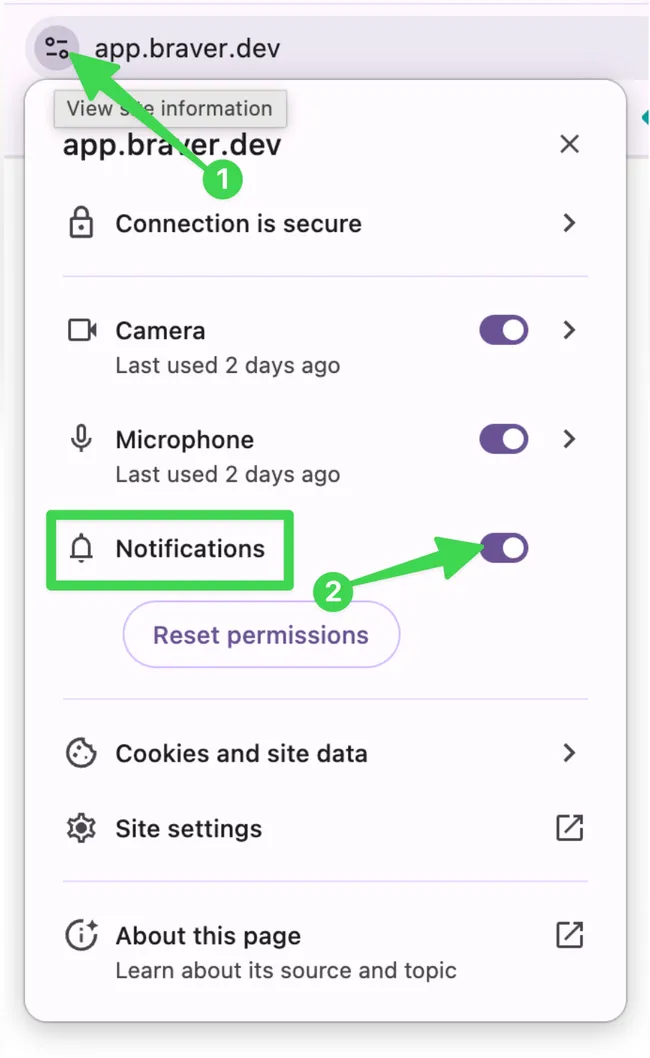
In the address bar, click the icon to the left of the URL. Find the Notifications row and change the value from Block to Allow.
-
Close the settings panel and reload the Braver page for the changes to take effect.
Microsoft Edge
Section titled “Microsoft Edge”-
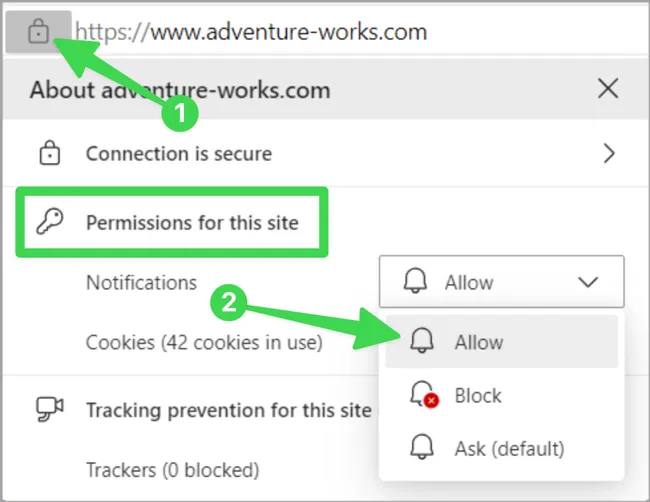
In the address bar, click the lock icon to the left of the URL. Click Permissions for this site, then in the Notifications section, change the setting from Block or Ask (default) to Allow.
-
Reload the Braver page to apply the changes.
Mozilla Firefox
Section titled “Mozilla Firefox ”-
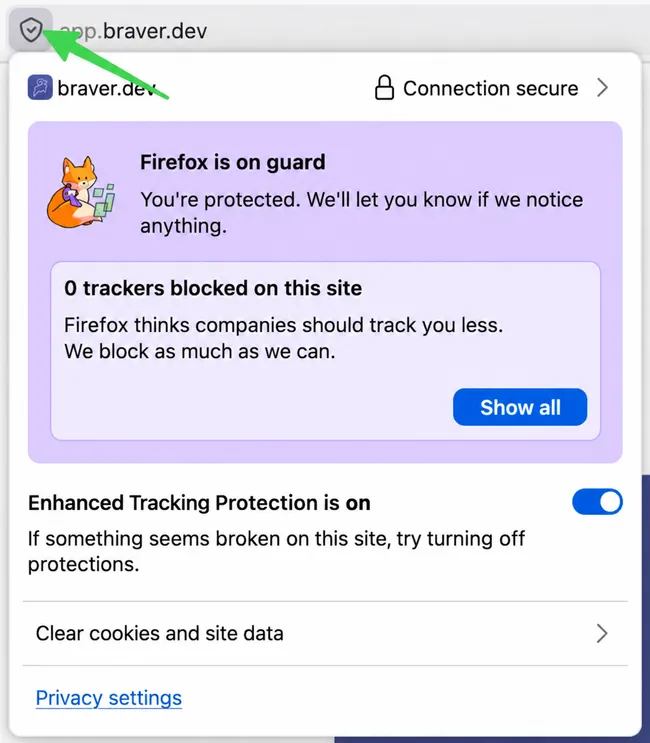
In the address bar, click the shield or lock icon to the left of the URL.
-
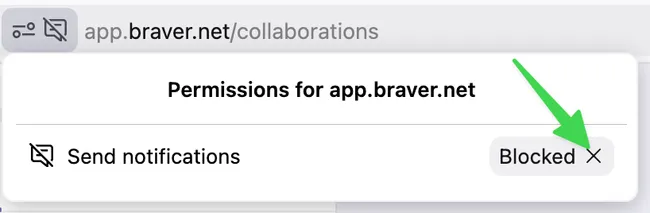
In the Permissions section, find Notifications and click the “X” next to Blocked to remove the block.
-
Reload the Braver page. You should now see a permission request for notifications.
Apple Safari
Section titled “Apple Safari”-
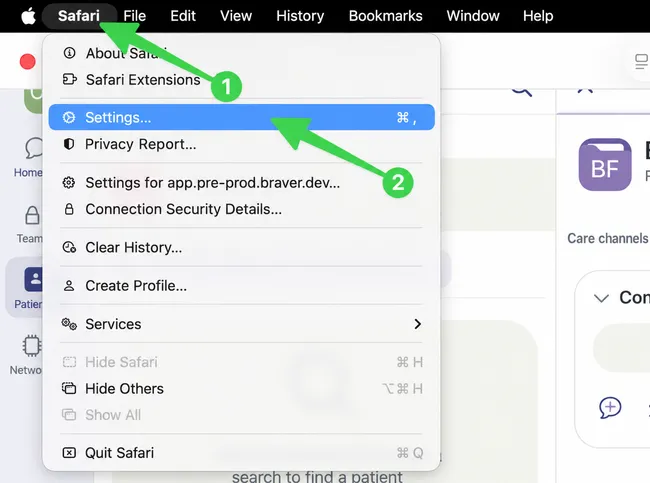
In the menu bar, click Safari, then Settings (or Preferences in older versions).
-
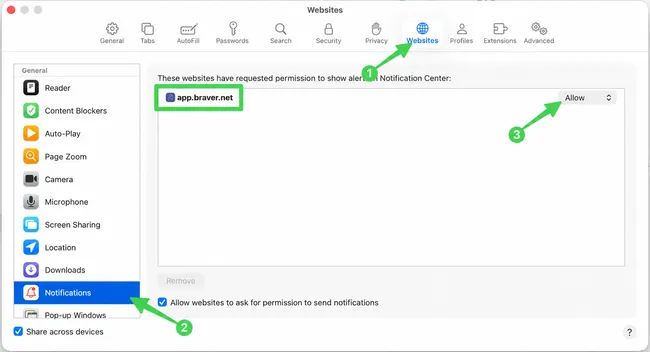
Click the Websites tab in the settings window. In the left column, click Notifications. Find app.braver.net in the list and change the notification setting from Deny to Allow.
-
If Braver doesn’t appear in the list, open the Braver application and you should see a permission request.
-
Close the settings and reload the Braver page.
Need More Help?
Section titled “Need More Help? ”If you have trouble enabling notifications, feel free to contact us.