
Set Your Availability Schedule
Step by Step
Section titled “Step by Step”-
Start by navigating to your profile at the bottom of the screen.
Section titled “Start by navigating to your profile at the bottom of the screen.”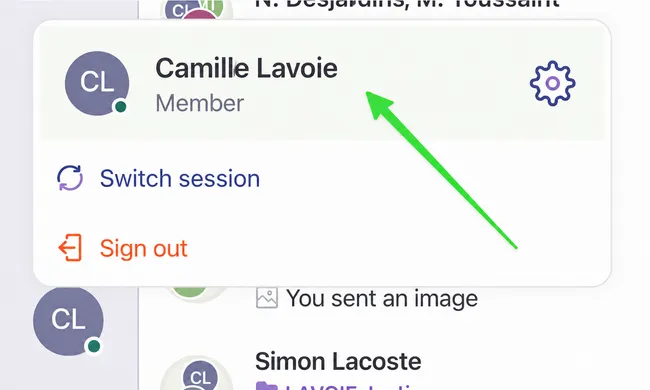
-
Click on the Settings tab.
Section titled “Click on the Settings tab.”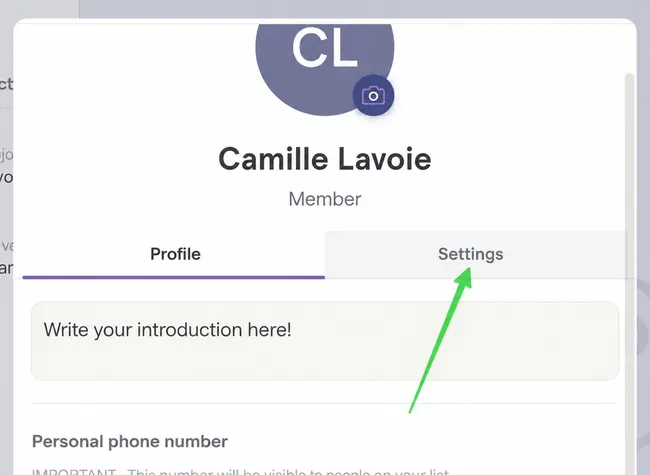
-
Select Availability Schedule. According to this schedule, your notifications will be paused until your return, when you will be informed of what you missed.
Section titled “Select Availability Schedule. According to this schedule, your notifications will be paused until your return, when you will be informed of what you missed.”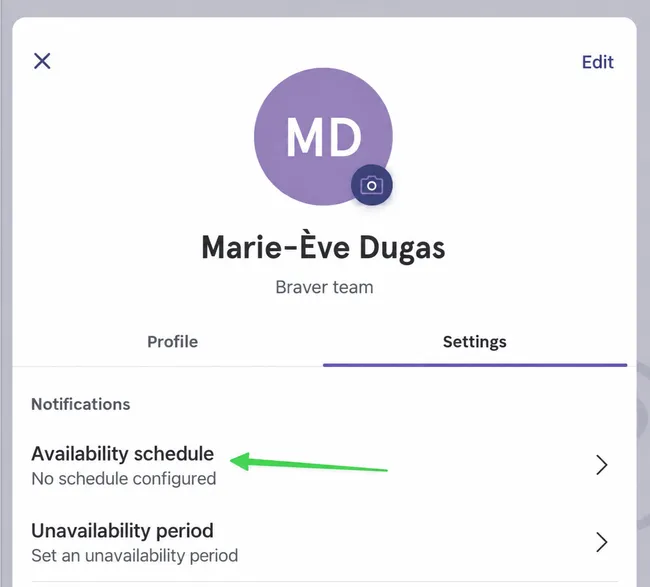
-
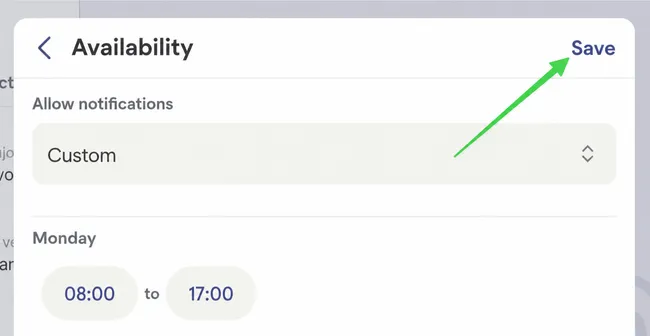
To modify your availability schedule, click on the dropdown menu to see the choices.
Section titled “To modify your availability schedule, click on the dropdown menu to see the choices.”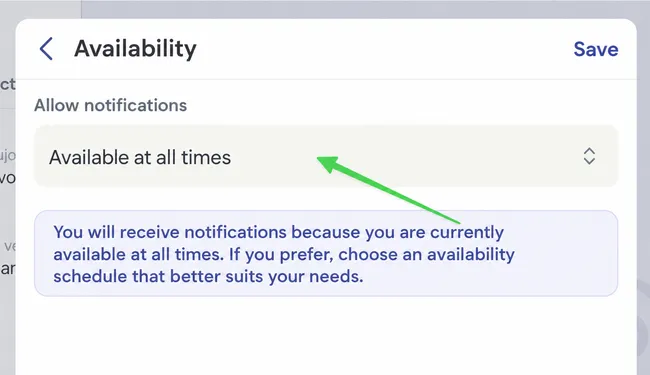
-
In this example, the user wants a custom work schedule.
Section titled “In this example, the user wants a custom work schedule.”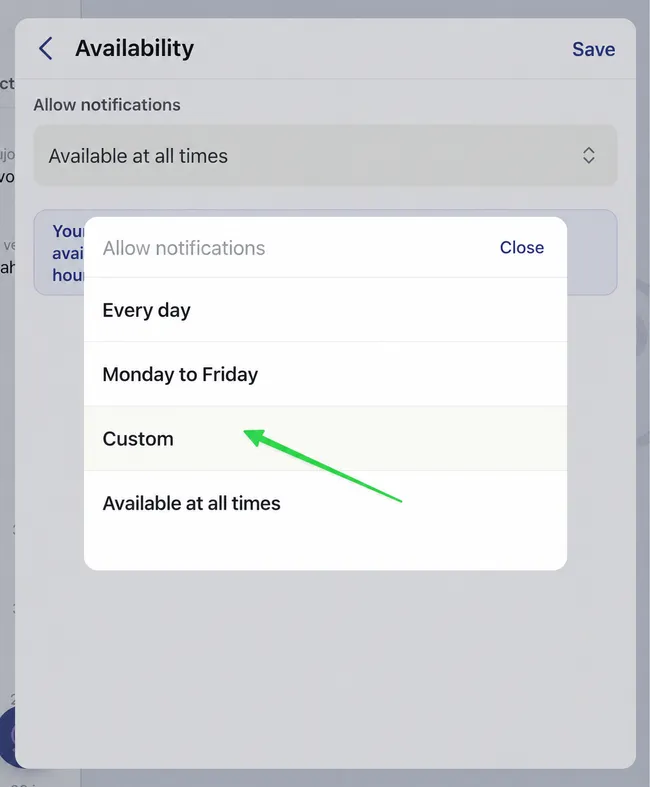
-
For a custom schedule, indicate the hours during which you want to receive notifications for each day of the week.
Section titled “For a custom schedule, indicate the hours during which you want to receive notifications for each day of the week.”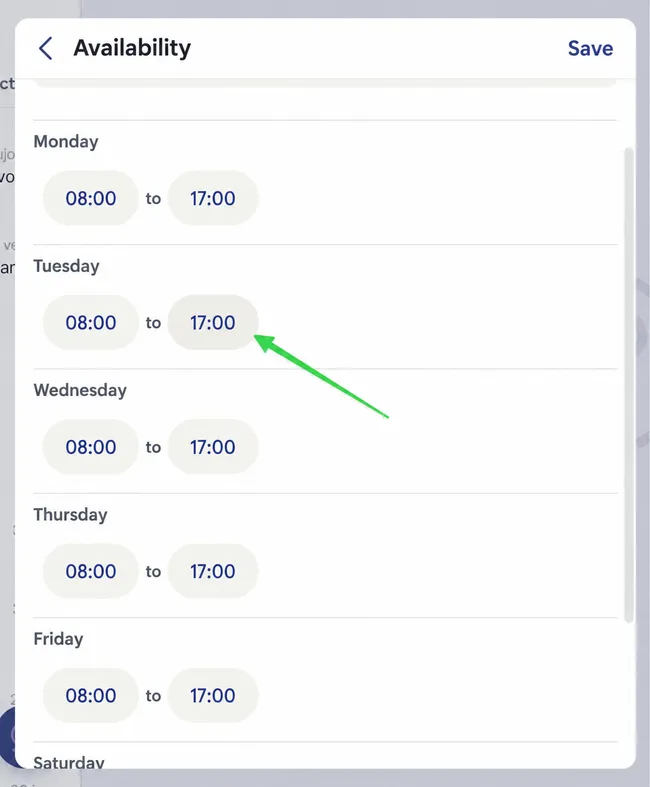
-
Save your schedule in the top right corner.
Section titled “Save your schedule in the top right corner.”